> For the complete documentation index, see [llms.txt](https://bricksmotion.gitbook.io/bricksmotion-components/llms.txt). Markdown versions of documentation pages are available by appending `.md` to page URLs; this page is available as [Markdown](https://bricksmotion.gitbook.io/bricksmotion-components/components/buttons/button-4.md).
# Button #4
**Unstyle the magnet area:** To get rid of the grey div (magnet area). Just reset all styles on `.btn4__magnet` except of the padding.
**Styling the button:** You can style the button as you like. Just select the class `.btn4`.
**Expanding the magnet area and adjusting magnetic value:**
1. Select the builder elment `BTN4 MAGNET` and the class `.btn4__magnet`. Go styling -> layout and adjust the padding to your needs.
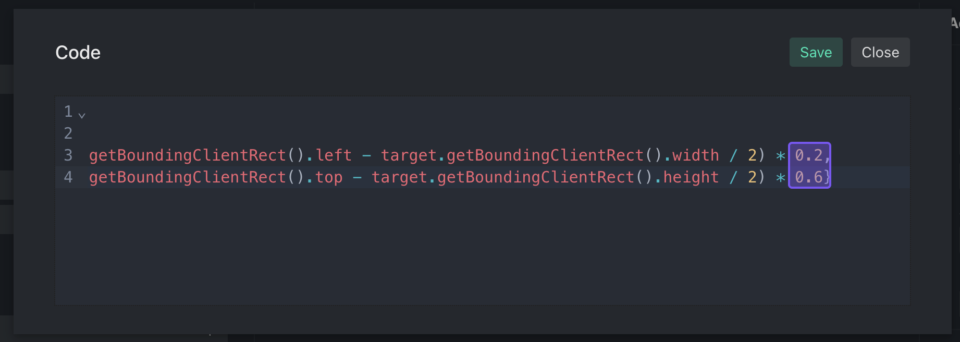
2. Open the Bricksforge panel got to events and select BTN4 MOUSEMOVE. In the animation object (far right) open the code panel.
3. Adjust the highlighted values. If you double up the padding of `.btn4__magnet` (from 20px to 40px) you should double up these values, too. Feel free to play around with the values until it fits your needs.
**Edit the mouseleave animation:** Open the Bricksforge panel go to events and select `BTN4 MOUSELEAVE`. In the animation object (far right) you can see 'duration' and 'ease'. You can adjust these values to your needs.